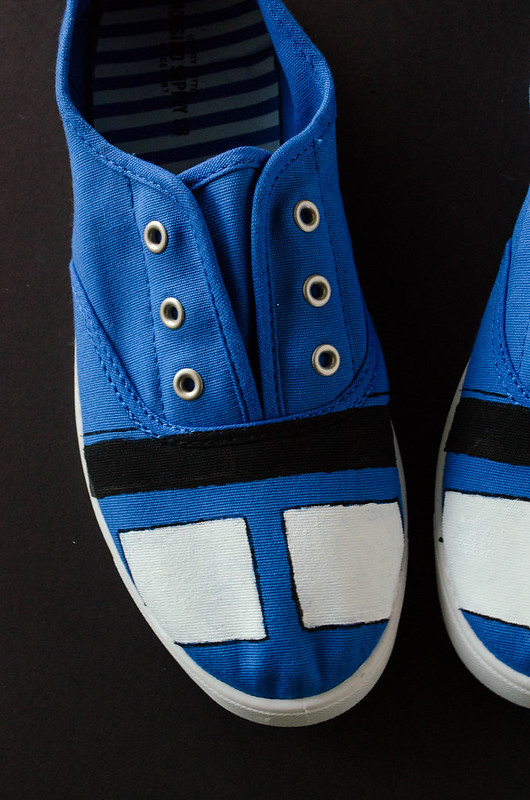
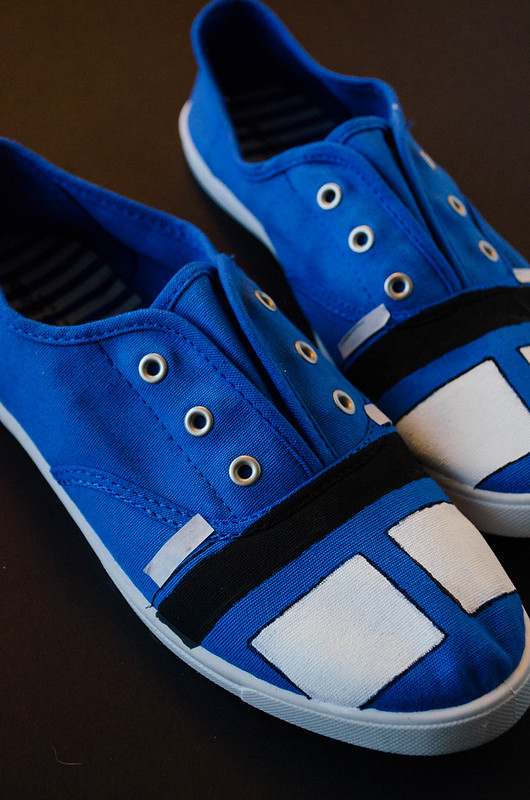
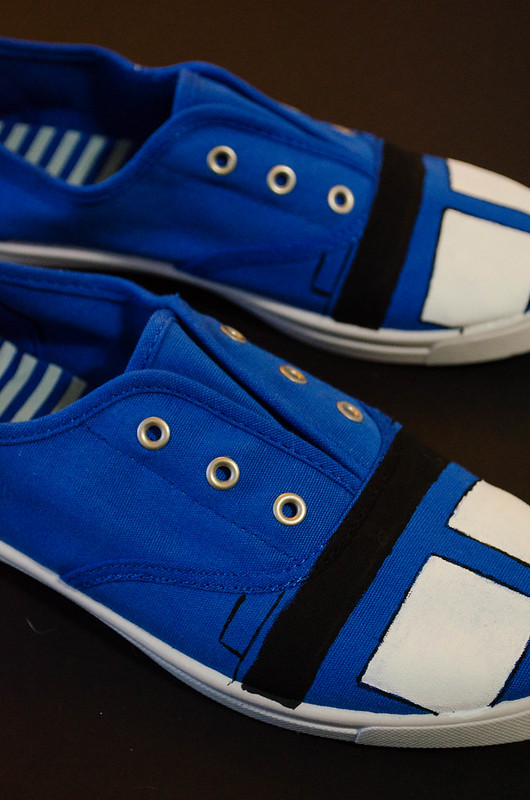
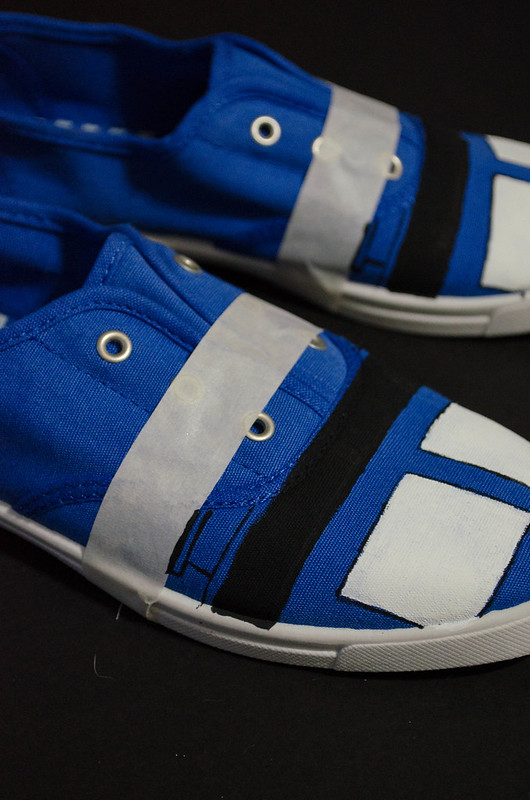
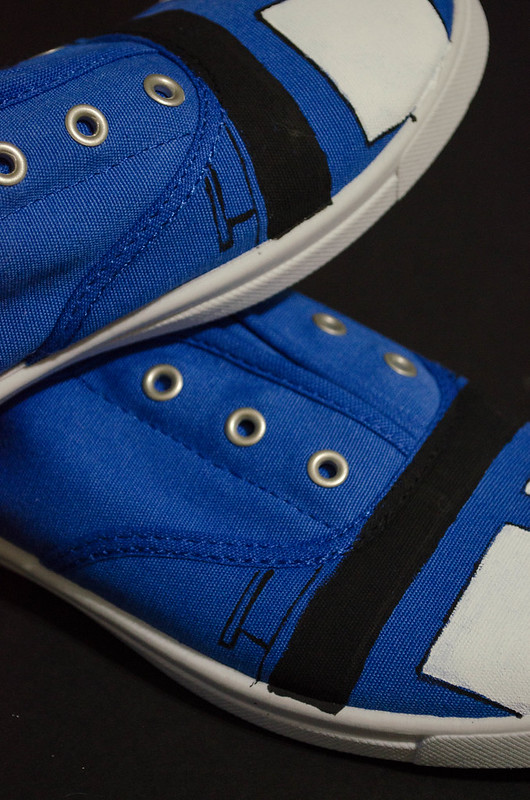
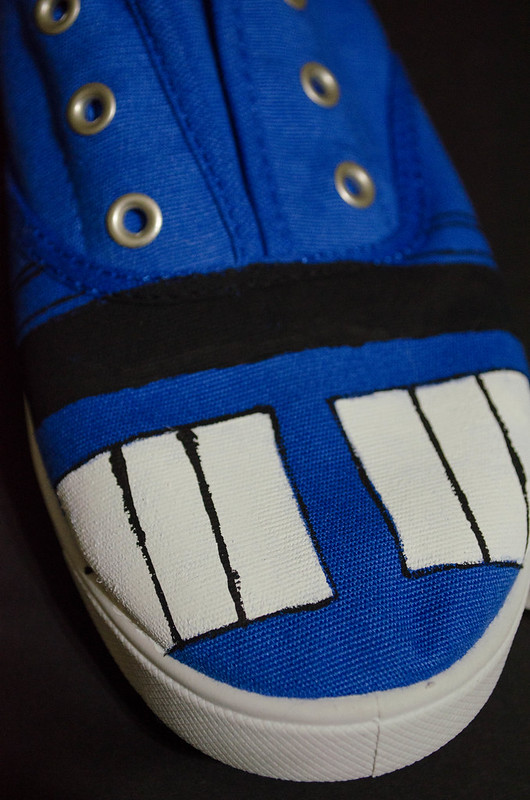
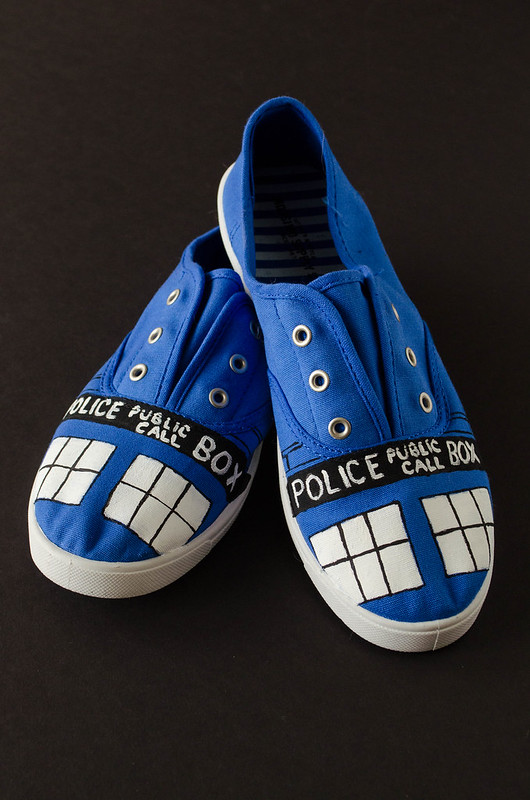
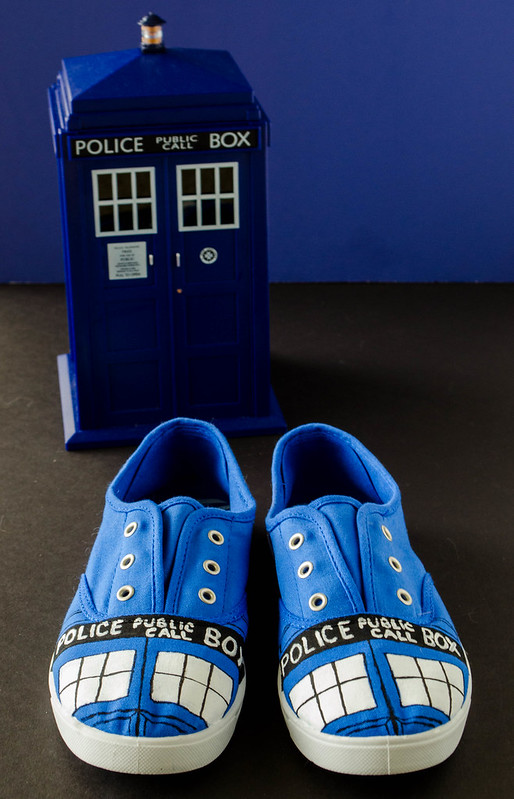
She lives?! Ha, sorry, guys.. April is by far my busiest month with finishing off all of my pharmacy rotations and having the last few rounds of exams. Since I actually have a WEEKEND without anything planned other than a bit of studying to get ahead for the week of finals, I also found a bit of time for crafting! And since I haven’t yet said a word about the new episodes of Doctor Who (which started March 30), you know it had to be Doctor Who related. These sneakers are something I have had pinned on Pinterest forever, and as soon as the weather was warm enough for blue plimsolls to be in stores, you better believe I immediately bought a pair. It took me probably around 4-5 hours to complete these, which included all of the planning for how I wanted to go about it. It was pretty relaxing to just paint these shoes with the warm breeze coming in the screen door after a long day of lectures — although I do have to say, I definitely can’t sit on the floor for hours like I used to. Ouch. Getting old! 😉
Before we get into the how-to with these shoes.. I have to ask. For you Whovians out there, how do you like the new episodes so far? Do you like Clara as a companion? I’m not going to say much – spoilers – but I will say this: I’m not entirely sure if it’s because I always take a while to warm up to a companion after the last one leaves, but so far, I don’t really like Clara. I loved her in Asylum of the Daleks, and I quite liked her in the Christmas special, as well. Maybe I’m just not used to the Ponds not being there, but these episodes just sort of seem.. off, with her as a character. She just doesn’t quite have that confidence she had in the first few times we saw her. Ah, well.. I’m sure it’ll get better – it always does.
So, these shoes! First, you’ll need some blue plimsolls (canvas sneakers). I got mine from Target, and they were on clearance for around $7! The rest of the supplies you’ll need, you can easily find at Walmart or any craft store. I used acrylic paint and some very fine paintbrushes to do all of this. You can also get acrylic paint markers, if you think that’ll make you feel more comfortable! I was feeling the brushes, so that’s what I used. You’ll need to set aside at least a few hours for the painting, and then leave them overnight in an open area after you spray them with waterproofing spray. So now.. let’s do this!
DIY TARDIS Sneakers
makes 1 pair (but you’ll probably have enough supplies for more if you want – just obviously get more than one pair of shoes)
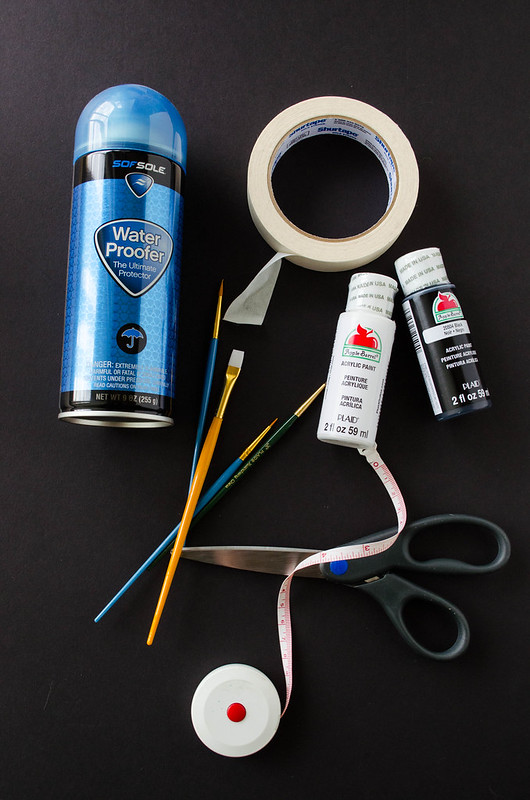
Supplies:
- 1 pair blue canvas sneakers
- 1 roll masking tape
- 2 fine paintbrushes (one for each color paint)
- 2 wider paintbrushes (for filling in)
- 1 pair scissors
- 1 measuring tape
- Water proofing spray
- 1 pencil
Instructions:
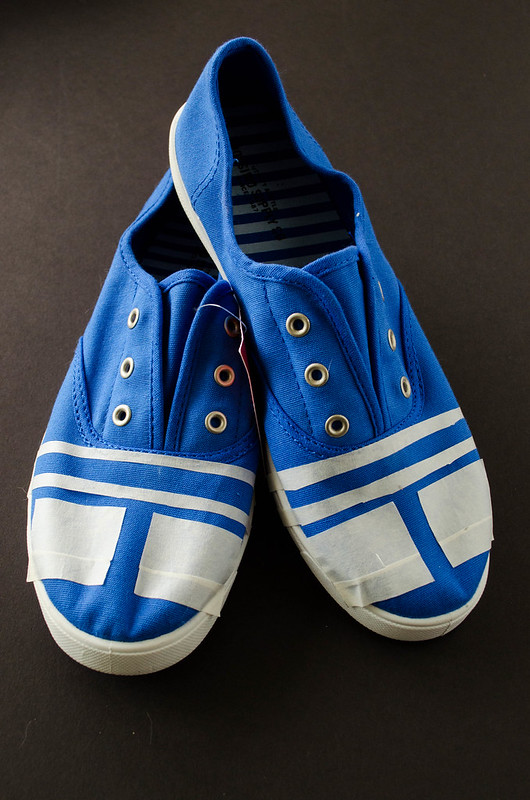
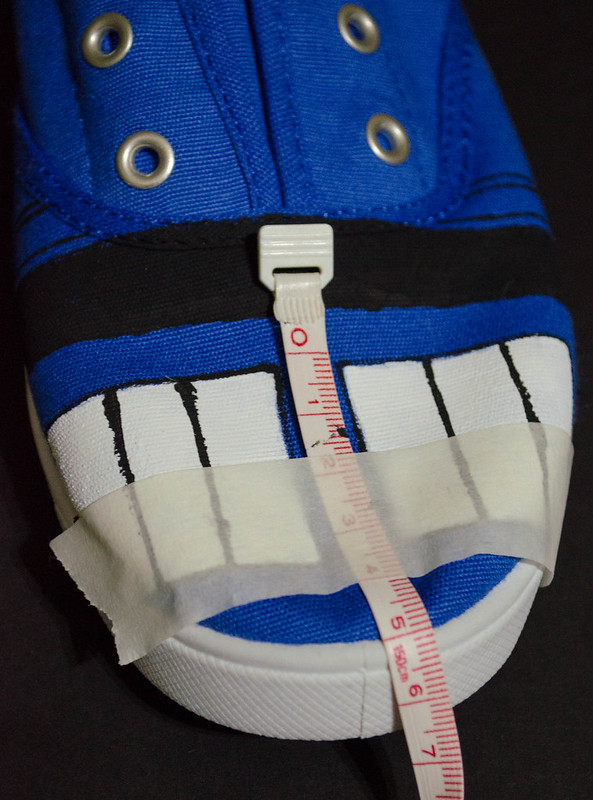
– First, you’ll want to measure and place tape for the outlines of the POLICE BOX strip and windows. My shoes are a little over 4 inches wide at the widest point, and my measurements are as follows (using the pencil to mark the tape for measurements/cut with scissors):
• 1.5 cm height for the POLICE BOX strip, spanning the width of the shoe (I measured this from top to top of the two strips of tape). I started the top of the POLICE BOX strip right at the curved seam of the shoe under the laces, as shown.
• 1 cm between the bottom of the POLICE BOX strip and the top of the windows (I measured this from top of the second POLICE BOX strip to the tops of the windows)
• 4 cm width, 3.3 cm height for EACH window
• 1 cm between each window — center them as best as you can, but since the shoes are rounded, they’ll be different distances from the sides, and parts will be cut off, as you can see from the picture.
– With the fine paint brush and black paint, outline just the top of each tape strip for the POLICE BOX label,
AND
outline the squares for the windows.
– Let dry for a few minutes (it will be quick), and then remove the tape. It’s fine if it’s not perfect.
– Using the wider paint brush and black paint, fill in between the two outlines for the background of the POLICE BOX label.
– Using the wider paint brush and white paint, fill in the windows, making sure to stay inside the black outline (if you mess it up, again, totally fine, we can go back and touch it up later!).
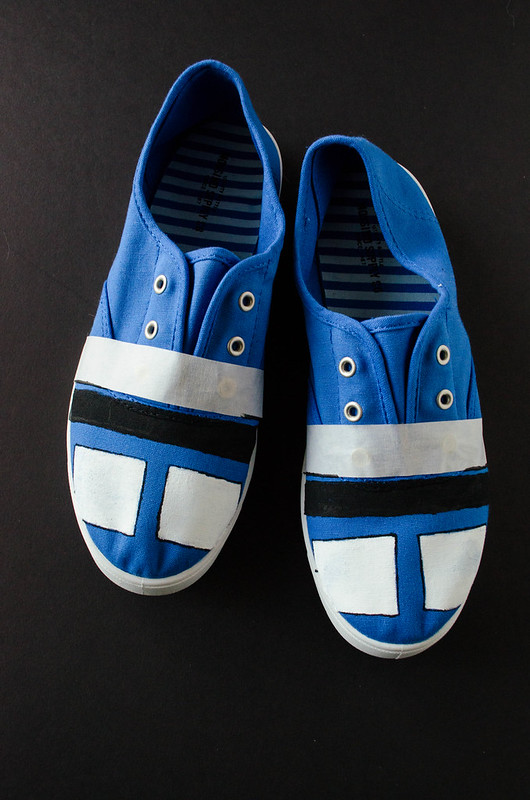
– Place tape across the entire width of the shoe about 0.3 cm above the black POLICE BOX strip.
– With the fine paint brush and black paint, outline the bottom of the tape, stopping in the center where the seam hits the tape (as pictured).
– Let dry for a few minutes, and then remove the tape.
– For the top of the TARDIS, cut tape so it is 0.5 cm height, and place it 1 cm from the edge of the shoe and right above the previously painted line (the width doesn’t matter as long as it hits the seam).
– With the fine paint brush and black paint, outline the top and outer edge of the tape just placed, stopping when it hits the seam of the shoe.
– Let dry for a few minutes, and then remove the tape.
– Place tape across the entire width of the shoe, about 0.3 cm above the top of the most recently painted line for the top detailing of TARDIS. Measure 0.5 cm from the edge of the shoe on each side and mark with pencil on the tape.
– With the fine paint brush and black paint, outline the bottom of the tape until you reach 0.5 cm from the edge of the shoe (and again, don’t pass the seam in the middle).
– Using the same brush and paint, paint the remaining corner from the line you just painted to make a thin rectangle that meets the previously painted shape (as pictured).
– Let dry for a few minutes, and then remove the tape. You have now completed the top of the TARDIS!
– Measure about 1.3 cm from the edge of the window, and place one piece of tape with the tape edge hitting that measurement down the height of the window. Measure from that tape edge another 1.3 inches, and place a second piece of tape with the tape edge hitting that measurement down the height of the window. These pieces will cover the outside edges of the window.
– At this time, you will also want to tape one of the windows on the other shoe just as you did above (one at a time on each shoe is best so you don’t have any smearing).
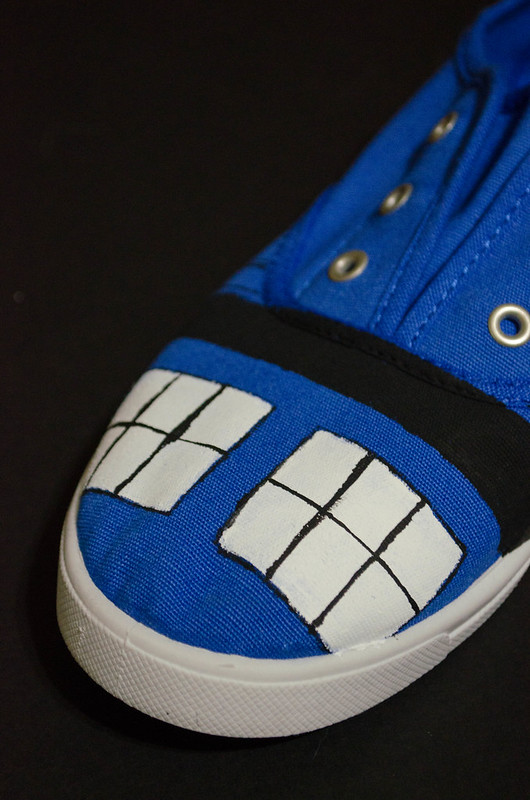
– With the fine paint brush and black paint, outline the tape edges down the height of the window to split the window in thirds widthwise.
– Let dry for a few minutes, then remove the tape.
– Tape the other windows with the same measurements as before, and repeat the outlining. Let dry, and then remove the tape.
– Measure about 1.7 cm down from the top of the window, and place the piece of tape widthwise across the entire width of the shoe with the tape edge lined up with that measurement to split the windows in half height wise.
– With the fine paintbrush and black paint, outline the tape edge across each window, making sure not to go outside of the windows.
– Let dry for a few minutes, and then remove the tape. You have now completed the windows!
(At this point, you’re going to want to take a sheet of paper and your pencil, and outline a 4 inch wide, 1 cm tall rectangle to practice your POLICE PUBLIC CALL BOX on. It’s very kindergarten-learning-your-letters-esque, but it’s so helpful. I also measured down the height 0.5 cm in the center to split the PUBLIC CALL part so they would have even height. Practicing this really helps with sizing of letters and spacing.)
- – After practicing on paper, using the PENCIL to start, write POLICE PUBLIC CALL BOX with the same spacing you used on the paper.
- *If you want, you can mark those measurements in lines with pencil on the shoe (just as you did on the paper), but you can’t really erase them easily.
- – Once you’re satisfied with the pencil markings, take the fine paint brush and white paint and trace over the pencil to create your POLICE PUBLIC CALL BOX sign.
– Place a piece of tape halfway between the two windows (0.5 cm) going lengthwise down the shoe for the doors.
– With the fine paintbrush and black paint, outline the tape edge from the bottom of the POLICE BOX sign to the bottom of the shoe.
- – Let dry for a few minutes, and then remove the tape.
- – Place tape 1 cm down from the bottom of the windows widthwise across the shoe for the cubed look of the TARDIS (outlines only shown – not the tape).
– With the fine paintbrush and black paint, outline the top of the tape edge.
– Let dry for a few minutes, and remove the tape.
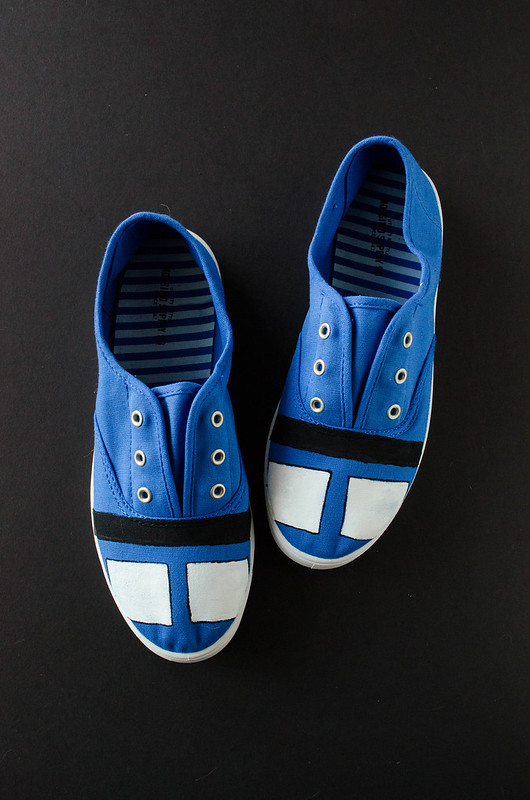
– With the fine paintbrush and black paint, freehand the inner lines to show the indentation by painting a diagonal line from each corner going inward, and then lines going down and to the side until you reach the edge of the shoe (as shown in picture above – you can skip this part if you want, it still looks fine!).
– Let dry for a few minutes, and then take the fine paintbrushes (with whichever paint you need) and touch up any lines you need to to make them smoother. You can do this as much as you need to – it’s pretty forgiving! Allow to completely dry (about a half hour).
– Setting the shoes on newspaper in a well-ventilated area, spray with an even coat of waterproofing spray over the entire shoe, and allow to dry for at least 6 hours (or overnight). You can do a double coat of waterproofing spray if you’d like, or you can wear them now.
Note: You could freehand all of this if you want, but I think you’ll want to plan it out at least the first few times you do it – you get better with the painting/freehand stuff as you do it more. If you have bigger shoes, you can easily scale the measurements up – just measure the width at the widest point, and then take your larger value and divide it by 4 inches. Multiply each measurement by the number you just calculated to make your shoes the proportions!
Hooray – you’ve just made your own TARDIS sneakers! Enjoy them!
If you have any questions about these, DO NOT HESITATE to contact me! And as always, leave a comment on how these worked out for you if you decide to make them! 🙂


