Mayonnaise, to me, has always been about the memories that surround it, rather than the ingredient itself. Obviously being pretty health conscious myself, mayo probably doesn’t sound like an ingredient that I would use frequently, but there are some dishes that I just can’t make without it. A “BELT” – a bacon, egg, lettuce, and tomato sandwich – is nothing without a generous spread of mayo on each slice of toasty bread holding it together. That sandwich reminds me of lunches at my grandma’s house; we’d all surround the table for sandwiches after playing outside for hours (when I was younger) or after taking a break from baking cookies for the most recent wedding (nowadays). Creamy potato salads remind me of summer days full of picnics, fireworks (and sparkler duels), and running through sprinklers. My dad always tells me stories of how they would eat mayo sandwiches – just bread and mayo – as he was growing up. Haha, can you imagine eating a mayo sandwich? My sister used to eat ketchup sandwiches sometimes, so I guess it’s sort of the same thing.
There’s just something about mayonnaise that brings a sort of nostalgia with it. So when I was given the opportunity to recreate my own version of one of Hellmann’s recipes for their 100th Birthday Celebration, I was all for it. Mario Batali created his own versions of classic Hellmann’s recipes, and he’s invited everybody to do the same by making their own version of his recipes, including YOU – all you have to do is go to the Facebook page to enter your recipe into the contest to win a trip to New York City to celebrate the 100th Anniversary! As soon as I saw the chocolate mayo cake, I knew exactly what recipe I wanted to make my own, which I’m sure is no surprise to any of you, knowing how much I love to bake.
I’ve never tried a chocolate mayo cake, but I’ve heard about how good they are, and I was really excited to finally try it myself. It’s just one of those recipes that you know has been passed down through generations of bakers with that secret ingredient to make it extra moist. I don’t know a cake that doesn’t have a ton of memories attached to it, whether it’s because of a birthday or because your grandma taught you to make it in her kitchen. It just so happened that Alex’s graduation celebration was just around the time I was making this cake, so now this new recipe has seen its first share of memories. And you better believe that I took this cake to the party with a couple slices already taken out – the life of a food blogger! It was a good little conversation piece, anyway! 😉
Because I love experimenting with gluten free baking, as you are well aware of if you’re a long time reader of this blog, I decided I would go with a gluten free variation of a chocolate mayo cake. It also meant that Alex’s mom would be able to enjoy it since she is gluten free by choice for health reasons, which made me really happy, since she doesn’t often get to have any special treats.
Because this was for Alex’s graduation celebration, I went for flavors that I knew he would love, and that was coffee without question. He’s a Starbucks addict, through and through, so I knew I had to make it mocha flavored. I did this by filling it with a coffee buttercream, while keeping the outside a chocolate buttercream. The cake has coffee in it, as well, but that’s mostly just to intensify the chocolate flavor – you can’t really taste it in the cake itself (although, I’m sure my dad could – he hates coffee).
It’s made gluten free with a combination of brown rice flour, almond flour, and quinoa flour. This might sound a little bit intimidating, but I grind all of these myself from brown rice, almonds, and pre-rinsed quinoa in my coffee grinder, each twice through (other than the almonds) so they’re extra fine. It makes it way easier and cheaper than buying all of the flours – you can just grind what you need, as you need it. The texture is slightly different than your standard cake would be, since rice flour is generally a bit more gritty, but it is easily overlooked with the flavor of this cake.
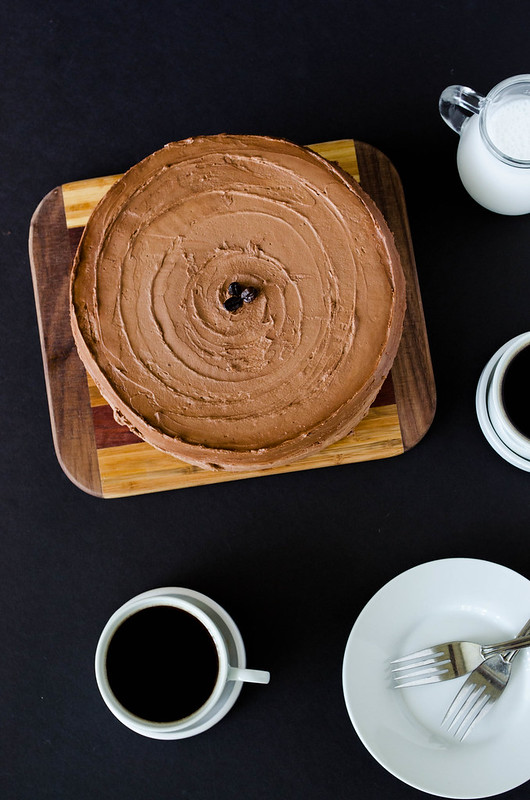
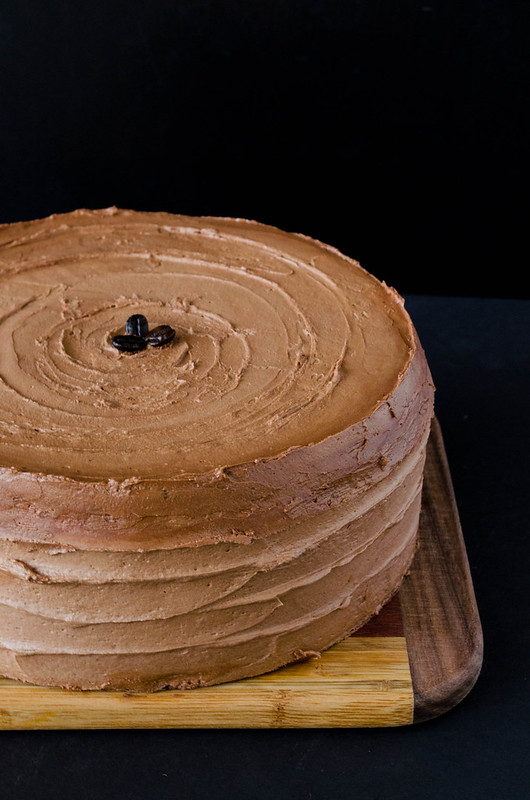
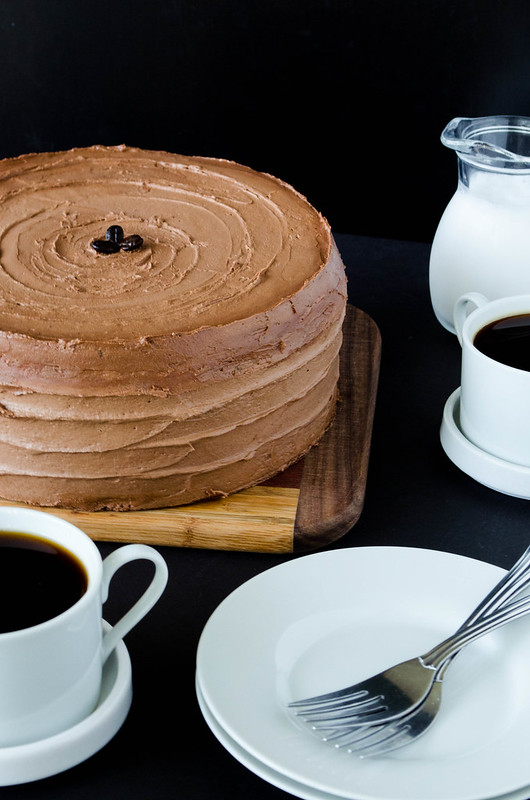
This cake is so, so moist. So chocolatey. Seriously, I could not have asked for better flavors going on in this cake. It all came out perfectly my first try, which is definitely not always the case with gluten free baking. I made swiss meringue buttercream for the frosting, which isn’t nearly as sweet as standard frosting, so it doesn’t overpower you with cloying sweetness. The silky smooth texture of swiss meringue buttercream is out of this world (I had never tried it before), and it is so easy to make!
This cake is easy to make in stages. I made the cake layers one day, wrapped them and put them in the freezer. A few days later, I made the frosting, and pulled the cake layers out and assembled the cake while they were still frozen. It then stayed in the fridge overnight once fully frosted until ready to serve the next day. Just let it come to room temperature before serving, and you’re golden!
What dishes do you make that have a lot of memories surrounding them? Family traditions or particular ingredients that always remind you of a moment in time?
- 1 1/2 cups brown rice flour
- 1 cup almond flour
- 1/2 cup quinoa flour **
- 1 1/2 cups cocoa powder
- 1 Tbsp baking powder
- 1 Tbsp baking soda
- 1 1/2 tsp salt
- 1 cup sugar
- 1/2 cup coconut sugar (or brown sugar)
- 1 3/4 cups coffee, cooled to room temperature
- 1 Tbsp vanilla
- 1 1/2 cups Hellmann's mayonnaise
- 2 eggs
- 2 tsp instant espresso powder
- 2 tsp boiling water
- 1 1/2 egg whites (45 g)
- 6 Tbsp sugar
- 1/2 cup (1 stick) butter, cut into tablespoons
- 1/2 tsp vanilla
- pinch of salt
- 2.5 egg whites (75 g)
- 1/2 cup sugar
- 1 cup (2 sticks) butter, cut into tablespoons
- 6 oz. dark chocolate, melted
- 1 tsp vanilla
- 1/8 tsp salt
Preheat the oven to 350ºF. Line the bottom of 3 9-inch round cake pans with parchment paper, and butter the paper and sides of the pan. Set aside.
In the bowl of a stand mixer, stir together the flours, cocoa powder, baking powder, baking soda, salt, and sugars. Add the coffee, vanilla, mayonnaise, and eggs, and mix on medium-low speed for about 2 minutes, until fully incorporated.
Divide the batter evenly between the 3 prepared cake pans, and bake at 350ºF for 20-25 minutes, until a toothpick comes out clean. Allow to cool in the pan for about 10 minutes before removing to a wire rack to cool (I find it's easiest to invert the cake pan onto a plate covered in plastic wrap, then inverting the plate onto the wire rack so that you don't end up breaking the cake into pieces since it'll still be warm at this point). Once cool, tightly wrap, and place in the freezer to chill up to 2 days.
In a small bowl, whisk together the instant espresso powder and boiling water, until dissolved. Set aside to cool.
Bring a saucepan filled with 2 inches of water to a simmer. Place the egg whites and sugar into a heat proof mixer bowl, and place above the water. Whisk the sugar and egg whites until warm to the touch and the sugar is dissolved.
Place the bowl back on the mixer stand, and whisk on medium-high speed until you have stiff, glossy peaks, and the mixture is cool, about 10 minutes.
Reduce speed to medium-low, and add the butter, one piece at a time, mixing until fully incorporated between each piece. If it appears curdled at this point, keep mixing until it becomes smooth again. Add the vanilla, espresso, and salt, and mix until well combined.
Switch to the paddle attachment and beat for about 2 minutes to remove air bubbles.
Melt the chocolate in a heat proof bowl in the microwave at 30 second intervals, stirring in between. Set aside to cool.
Bring a saucepan filled with 2 inches of water to a simmer. Place the egg whites and sugar into a heat proof mixer bowl, and place above the water. Whisk the sugar and egg whites until warm to the touch and the sugar is dissolved.
Place the bowl back on the mixer stand, and whisk on medium-high speed until you have stiff, glossy peaks, and the mixture is cool, about 10 minutes.
Reduce speed to medium-low, and add the butter, one piece at a time, mixing until fully incorporated between each piece. If it appears curdled at this point, keep mixing until it becomes smooth again. Add the vanilla, melted chocolate, and salt, and mix until well combined.
Switch to the paddle attachment and beat for about 2 minutes to remove air bubbles.
If you’re a visual person, there’s a great step-by-step swiss meringue buttercream post at Sweetapolita.
Take the chilled cake layers and place one layer on a 9-inch cake board, glued into place by a pea sized amount of frosting. Place about 1/2 cup of the coffee buttercream filling in the center of the layer (half of the filling), and spread with a small offset spatula to about 1/2 inch away from the edge of the cake. Place the second cake layer on top, repeat with the other half of the filling, and top it with the final cake layer.
Place a generous dollop of the chocolate buttercream frosting on top of the cake, spread evenly with an offset spatula, working down the sides until you have a thin layer of frosting around the entire cake. Chill until set, about 30 minutes.
Once set, remove from fridge and add another large dollop of the chocolate buttercream on top of the cake and spread the same way, adding another coat of frosting. Scrape off the excess frosting with a straight blade spatula and smooth out. To get the swirl design as mine was frosted, take a straight spatula and hold at about a 45 degree angle at the bottom of the cake. Turn the cake with light pressure on the spatula against the cake, until you make the swirl all the way around (I recommend a turntable for this – you can find them at Target/Walmart – spice turntables work great!). Repeat going up the cake. Do the same swirling pattern on top, starting from the outside and working your way in.
Chill in the fridge until about a half hour before ready to serve. Allow to come to room temperature before serving. Leftovers can be stored in the fridge, covered, for up to 5 days (or at room temperature, covered, for up to 2 days).
**For non-gluten free version, substitute the brown rice, almond, and quinoa flours for 3 cups all purpose or white whole wheat flour.
inspired by Hellmann's
Disclaimer: I was compensated for creating this recipe for Hellmann’s Making Over the Best Campaign. All opinions are my own.


