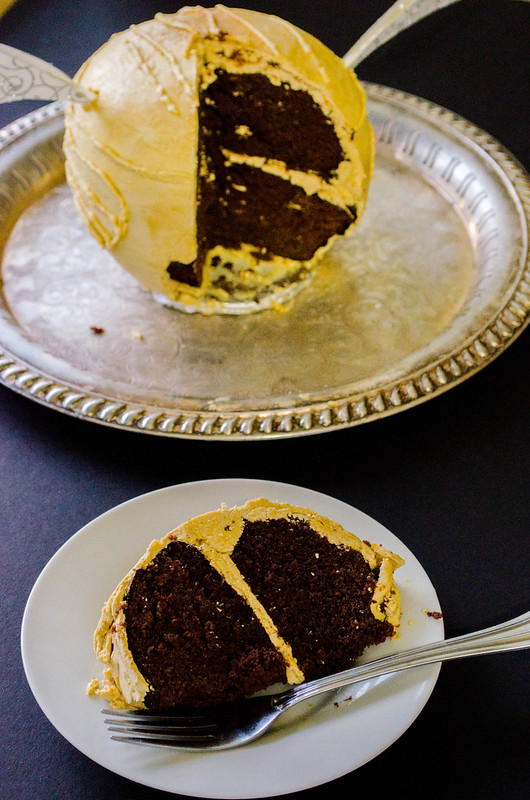
Today, my friends, marks both Harry Potter and JK Rowling’s birthdays. Since there are no new books or movies being released, this was the perfect excuse for me to make a cake in celebration, HP-style.
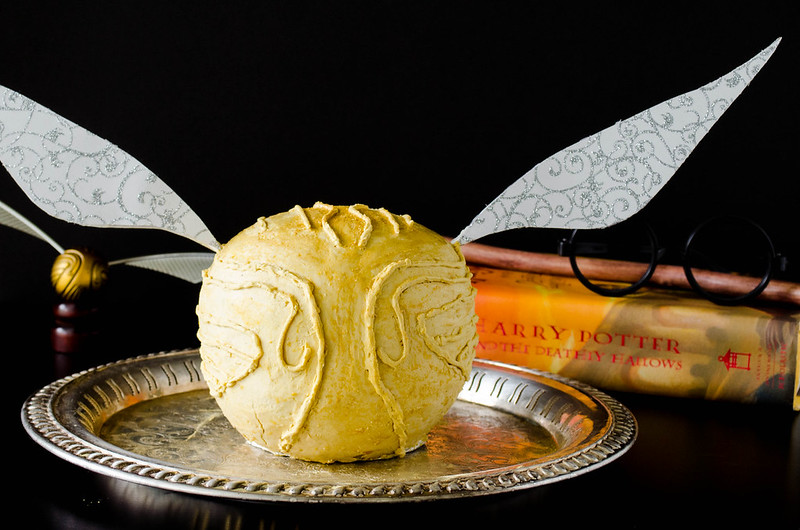
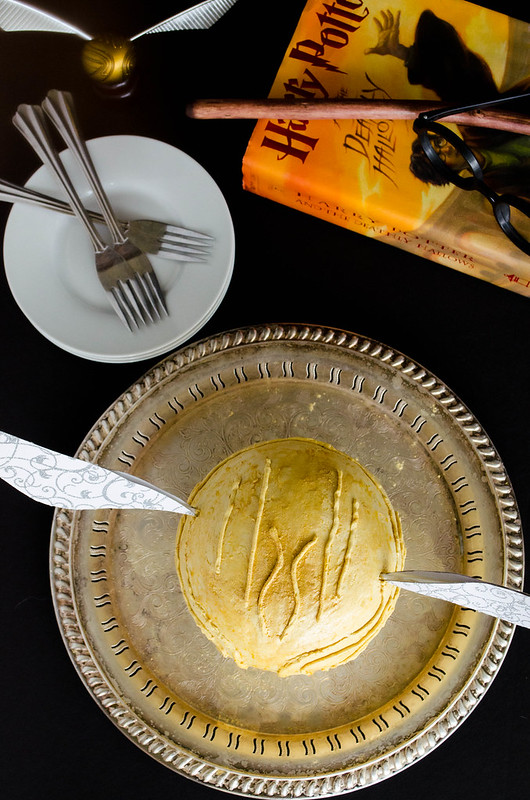
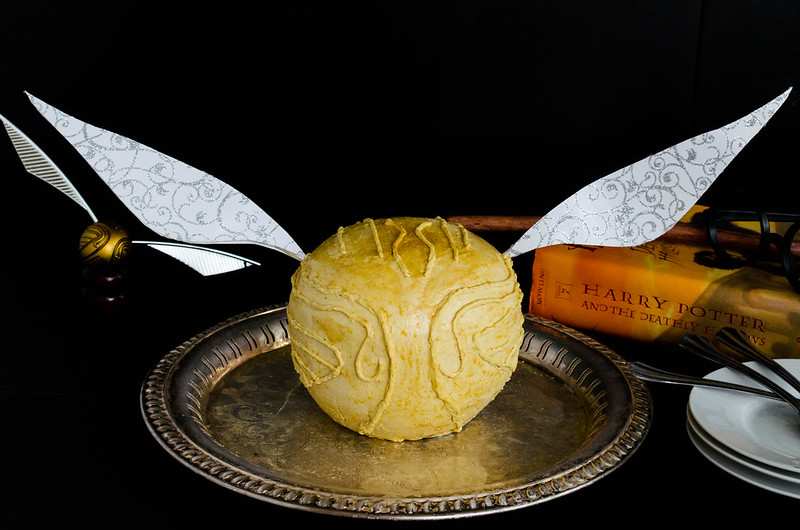
I decided to make a cake in the shape of a golden snitch, much like the cake that Mrs. Weasley made for Harry on his 17th birthday. I do love a golden snitch.
I made the cake in 1-quart Pyrex bowls – chocolate and gluten free – so that I wouldn’t have to buy fancy ball pans. As long as you grease the bowls really well, it works out fine. If any chunks come off, it can easily be fixed/masked with frosting. You can choose whatever kind of cake you like for the inside; you just need about 4 cups of batter for the size cake that I made (which serves about 10).
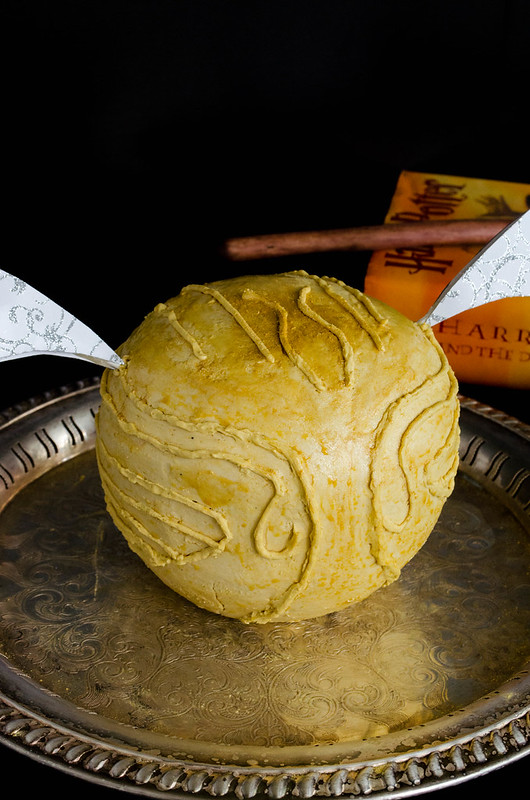
I made a swiss meringue buttercream (my all-time favorite frosting) for the filling and frosting, using coconut sugar to add a bit of brownish golden color, along with yellow food coloring. I flavored it with butterscotch schnapps to make a flavor reminiscent of butterbeer. I sprinkled some gold pearl dust for some sparkle and shine.
The wings are just made of scrapbook paper hot glued to lollipop sticks; I chose some swirly silver paper, which I fell in love with. You can choose gold or silver; in the movies, the wings are gold, and in the books, the wings are silver. I opted to go with being true to the books, but it’s totally up to you! I used a template from MuggleNet for the shape – I enlarged the template to be 5 inches wide.
This cake, while it takes some time, was a lot easier than it appears. Once you’ve got the cakes baked and removed from the pans, I find it easiest to wrap them and put them in the freezer overnight. It makes frosting and stacking a lot easier. A crumb coat (thin layer of frosting to seal in crumbs) is definitely key here. Putting it in the fridge between coats is also really helpful. I outlined the designs (comparing to my little snitch model) with a toothpick before piping them using a Wilton #3 tip. It doesn’t have to be perfect, so don’t worry if your hands are shaky!
The only complaint I have about my cake is that I made it on a rainy day, which always causes the swiss meringue buttercream to sort of “sweat.” I had little beads of yellow moisture as I was decorating, so I kept just dabbing them away with a paper towel, since the frosting was set from being in the fridge. I wasn’t even sure if I’d be able to make this cake work, so I have to say, I’m glad that was my only issue!
This cake is definitely a showstopper, perfect for any Harry Potter fan’s birthday (or a viewing party, or any occasion, really)! A very happy birthday to Jo and Harry!
Have you ever made a themed dessert for your favorite book, TV show, or movie?
- 2/3 cup coconut flour
- 1/2 cup cocoa powder
- 1/2 tsp baking soda
- 1/2 tsp salt
- 1/2 cup plain greek yogurt (I love Chobani)
- 3/4 cup honey
- 6 eggs
- 1/2 cup water (or coffee)
- 1 Tbsp vanilla extract
- 3 egg whites (90 g)
- 1/2 cup + 2 Tbsp coconut sugar (or brown sugar)
- 1 cup (2 sticks) butter, cut into tablespoons
- 1 tsp vanilla extract
- 2 Tbsp butterscotch schnapps (or flavoring)
- pinch of salt
- yellow food coloring (I used about 14 drops)
- gold pearl dust or gold color mist, for shine/sparkle
- 1 large piece of scrapbook paper (silver or gold)
- template for tracing
- 2 lollipop sticks
- hot glue
Generously grease two 1-quart Pyrex (oven safe glass) bowls (or ball pans). Preheat the oven to 350ºF.
In a small bowl, stir together the coconut flour, cocoa powder, baking soda, and salt. Set aside.
In the bowl of a stand mixer, beat the yogurt and honey together, until smooth. Add the eggs, one at a time, until well mixed. Add the water (or coffee) and vanilla extract, mixing until smooth. Slowly add the flour mixture, beating until well incorporated.
Divide the batter between the two bowls (about 2 cups batter in each). Bake at 350ºF for 30-35 minutes, until a toothpick comes out clean.
Allow to cool in the bowls for at least 10 minutes before sliding an offset spatula (or knife) around edges to release, turning out onto a plate. Allow to cool completely before wrapping tightly in plastic wrap/foil and placing in the freezer for 2 hours (or overnight) to set.
*Note: If you don’t need a gluten free cake, you can use your favorite cake recipe (or box mix), any flavor, using about 4 cups of the batter. Follow the same instructions for the use of the bowls.
Bring a saucepan filled with 2 inches of water to a simmer. Place the egg whites and sugar into a heat proof mixer bowl, and place above the water. Whisk the sugar and egg whites until warm to the touch and the sugar is dissolved.
Place the bowl back on the mixer stand, and whisk on medium-high speed until you have stiff, glossy peaks, and the mixture is cool, about 10 minutes.
Reduce speed to medium-low, and add the butter, one piece at a time, mixing until fully incorporated between each piece. If it appears curdled at this point, keep mixing until it becomes smooth again. Add the vanilla, butterscotch schnapps, and salt, and mix until well combined. Add the yellow food coloring, mixing until you reach your desired golden color.
Switch to the paddle attachment and beat for about 2 minutes to remove air bubbles.
If you’re a visual person, there’s a great step-by-step swiss meringue buttercream post at Sweetapolita.
Print out the template (link above), and cut out each wing.
On the back of the scrapbook paper (where there is no print/design), trace the wings, writing side up. Flip each of the wings over, writing side down, and trace again. Cut out the four wing pieces. They will be double sided.
Line up the wings so they are double sided, making sure they line up evenly. Set one wing with the inside facing you, and place a lollipop stick at the inner corner (the lollipop stick should have about half sticking out of the paper). Hot glue the lollipop stick in place.
Line the edges of the same wing with hot glue, and then match it up with the other piece, gluing them together. Cut off any overlap/visible glue chunks. Repeat with the other wing.
Remove the cake layers from the freezer and unwrap.
On a 6-inch cake board (you can cut it even smaller, about 3 inches in diameter, so it fits the bottom of the cake) on a turntable (for ease of frosting), place the bottom cake layer flat side down. Put a dollop of frosting on the top (round side), and coat the entire top evenly using an offset spatula. Once frosted, gently flip the layer over, round side down, making the bottom of the cake.
Place a dollop of frosting on the top of the bottom later (the flat side), for the filling, smoothing to the edges with an offset spatula. Place the top layer, flat side down, on top of the bottom layer.
Place another dollop of frosting on the top later (round side), spreading a thin layer of frosting all over, filling in any gaps between the two layers, for the crumb coat. It doesn’t need to be perfectly round at this point; you can shape later. Just make sure all of the crumbs are sealed in.
Place in the fridge to set for about 20 minutes.
Once chilled, place another large dollop of frosting on top of the cake, and coat the entire cake with the second layer of frosting with a straight spatula, smoothing out the frosting and making sure the edges are round. To get a smooth finish, warm the spatula with warm water, drying it with a towel, and using that to smooth the edges.
Place in the fridge again to set for about 20 minutes.
Once set, poke the wings gently into the sides (not going all the way in) to mark their place. Outline all of the snitch designs gently with a toothpick, wiping away any excess frosting that scrapes off.
Place the extra frosting into a piping bag with a Wilton #3 round tip attached (or any tip good for writing), and trace the outlines you created. You can easily smooth any mistakes over and start over.
Insert the wings into the sides, pushing them in until the lollipop sticks are no longer seen.
Sprinkle the cake with gold pearl dust or spray with gold color mist (optional).
Store in the fridge until about 1 hour before serving. Store leftovers in the fridge (preferably in an airtight container) for up to 5 days.
https://cookingalamel.com/2013/07/golden-snitch-cake-gluten-free.html


