cooking ala mel

healthy recipes and the occasional craft

facebook instagram pinterest RSS Feed email bloglovin' goodreads
  • Home
  • About
    • Links and Resources
  • Contact
  • Recipes
    • Appetizers
    • Drinks
      • Cocktails
      • Smoothies/Milkshakes
    • Soups
    • Salads
    • Baked Goods
      • Muffins
      • Quick Breads
      • Scones/Biscuits
      • Yeast Breads
    • Breakfast
      • Donuts
      • Eggs
      • Granola/Bars
      • Oatmeal
      • Pancakes/Waffles
    • Main Dish
      • Beef
      • Chicken
      • Pasta/Grains
      • Pizza
      • Pork
      • Sandwiches
      • Seafood
    • Side Dishes
    • Sauces/Spreads
    • Gluten Free
    • Ingredients
    • Pets
    • Desserts
      • Brownies/Bars
      • Cake
      • Candy
      • Cookies
      • Cupcakes
      • Frozen Treats
      • Pies/Crumbles
      • Pudding/Custard/Sauces
    • Roundups
  • DIY
    • Crafts
    • Decorating
    • Geek
    • Homemade Gifts
  • Lifestyle
    • Things I’m Loving
    • Travel
    • Wedding

DIY Iced Coffee (Coffee Concentrate)

June 26, 2013

Since I’m the only one in the apartment the drinks coffee in the mornings, now (Alex makes his at work), I’ve been looking for different methods of making my cup in the morning, instead of making an entire 8-cup French press for myself.  As the weather gets hotter and hotter, I’ve also wanted my regular cup of hot, black coffee less and less.  Not being able to actually pass up the caffeine, I decided to give iced coffee a try.

Other than my short stint working at Dunkin’ Donuts for a summer where we got unlimited drinks, I never really got into drinking iced coffee, for no other reason than I don’t often actually buy my coffee. After seeing countless tutorials for making iced coffee by the cold brew method, I decided I’d finally give it a shot.  I’m really, really glad I did.  I forgot how much I loved iced coffee!  I started by making some coffee ice cubes with my leftover coffee in my French press (you can also use the coffee concentrate, diluting it 1:1 with water).

The ice cubes guarantee that you don’t water your coffee down while keeping it cold – one of those trusty Pinterest finds.  The concentrate itself could not be more simple – simply combine ground coffee (I always grind it myself to ensure it’s fresh) and water, letting it sit for 12 hours before straining.  I used a 1:4 ratio of ground coffee to water, but feel free to experiment.
Once your concentrate it all set, you can make it into either hot or iced coffee by diluting with hot water, cold water, or your favorite milk or creamer.  I’ve found that I enjoy a 1:1 ratio of coffee to whatever diluent I choose.  I like my hot coffee black, so I do half concentrate, half boiling water.  Iced coffee, I enjoy either way, black or with milk.  This time, I opted for unsweetened coconut milk, again at that 1:1 ratio.  You can then add whatever sweeteners you like!  I like liquid stevia when I decide to sweeten it, but it’s just as refreshing without.
One thing I really like about the cold brew method is how smooth of a cup of coffee it makes.  It’s not overly harsh and acidic like some bad cups of coffee can be.  I don’t think I’d be able to handle iced coffee like that, so this concentrate is perfect.  Have fun with playing around with the ratio for your perfect cup of coffee – everyone’s tastes are different!
Oh, and I would recommend not making nearly as big of a mess as I did.  If you follow me on Instagram, you’ll have already seen the puddle I left behind.  That’s what happens when you try to pour milk into the glass while simultaneously taking a photo (without a tripod).  Umm.. I totally missed the glass.  Oops.  Perhaps I should invest in a tripod before I start messing around with pour shots? 😉  But anyway.. hope you enjoy this!  Such an easy way to save money by making your own iced coffee!
This is also great for baking and flavoring – here’s a recipe for coffee frozen kefir (or yogurt)!
What’s your favorite way to drink your coffee?  Do you prefer it extra creamy (a little bit of coffee with your cream)?  Black?
 
 
Print
DIY Iced Coffee (Coffee Concentrate)

yields about 4 cups of concentrate

DIY Iced Coffee (Coffee Concentrate)

  • 1 cup freshly ground coffee
  • 4 cups water

In a large container or jar, stir the ground coffee and water together. Cover and place in the fridge for 12-24 hours. Remove from the fridge and strain out the grounds using a coffee filter over a fine mesh strainer (you can also use cheesecloth/nut milk bag). Store the concentrate in the refrigerator, tightly sealed.

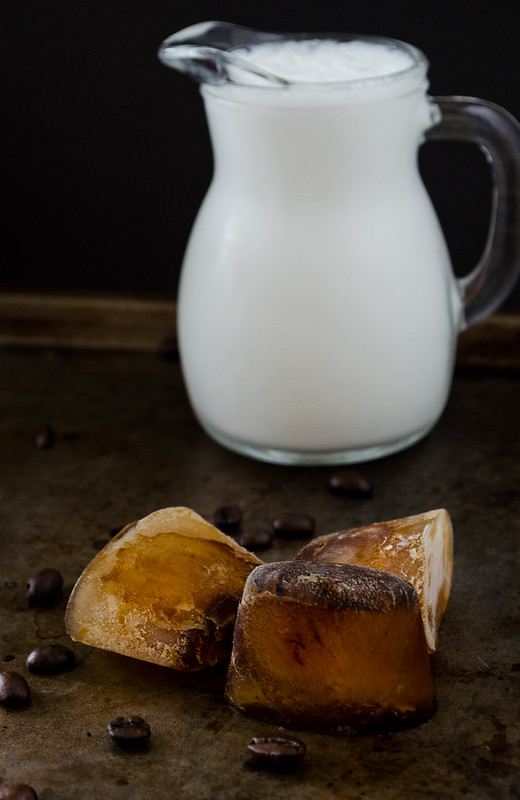
To make coffee ice cubes, dilute the coffee concentrate with water at a 1:1 ratio, i.e. 1/2 cup concentrate to 1/2 cup water, and pour into an ice cube tray. Place in the freezer until frozen, then pop the ice cubes out and store in a freezer bag in the freezer.

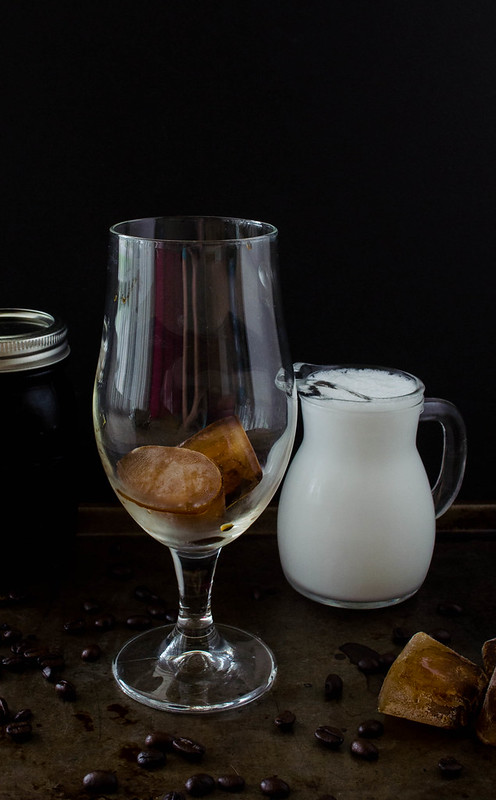
To make iced coffee, dilute the coffee concentrate with cold water, milk, or creamer (or any combination thereof) at a 1:1 ratio, i.e. 1/2 cup coffee concentrate to 1/2 cup coconut milk, and add 1 or 2 coffee ice cubes. Adjust the ratio as it suits your tastes (1:2, 1:3, etc.). Add sweetener and/or flavoring, to taste.

To make hot coffee, dilute the coffee concentrate with hot water, milk, or creamer (or any combination thereof) at a 1:1 ratio, as above. If you like a lot of cream or milk, you may want to heat those a bit before adding to the concentrate, to ensure you have a hot cup. Adjust the ratio as it suits your tastes, as above. Add sweetener and/or flavoring, to taste.

3.1
https://cookingalamel.com/2013/06/diy-iced-coffee-coffee-concentrate.html
Recipe by Melinda Novak, owner of cookingalamel.com

Related

Leave a Comment

Welcome to
cooking a la mel!
I'm Melinda, a baking, fitness, and reading-obsessed pharmacist, crazy cat lady, and geek. This is my little place on the internet to share mostly healthy recipes and the occasional geeky craft. I am all about balance in every aspect of life, especially when it comes to food! More>>

recent reader favorites

_blank
_blank
_blank
_blank
_blank
_blank
_blank
_blank

mel’s current favorites

_blank
_blank
_blank
_blank
_blank
_blank
_blank
_blank
Copyright © 2024 Cooking a la Mel | Privacy Policy

facebook instagram pinterest RSS Feed email bloglovin' goodreads